Inspirated


June 8, 2015

Release: Bro 2.3.1-2 on OpenWRT

Filed under: Blog — krkhan @ 12:08 am

As I promised in the comments section of previous post, I set out on the adventure of recompiling Bro for Lantiq routers. As a result of the exercise I have new-found respect for open-source package maintainers. Holy waffles if troubleshooting build errors in a large Autotools mess isn’t the most hemorrhage-inducing activity known to mankind.

Anyways, this time I’ve tried to keep track of the changes I’ve been making along the way. The full set of updated Makefiles and patches is maintained in the openwrt-bro repo. Also, the compiled ipk packages for Atheros and Lantiq routers are available on the release page.

Now that I have a reasonably updated Buildroot on my system and an organized set of patches, feel free to request an ipk package for your router. While I can’t guarantee that the clusterfuck of patches will compile smoothly for your platform, I’ll still give it a try.

Tags: , , , , , , , , ,

July 31, 2014

Bro IDS on OpenWRT Part II — The Paper

Filed under: Blog — krkhan @ 11:40 pm

The paper chronicling our adventures with Bro IDS on home routers just got published in the latest issue of SIGCOMM CCR. Here’re the details:

Title: Rapid and Scalable ISP Service Delivery through a Programmable MiddleBox

Abstract: With only access billing no longer ensuring profits, an ISP’s growth now relies on rolling out new and differentiated services. However, ISPs currently do not have a well-defined architecture for rapid, cost-effective, and scalable dissemination of new services. We present iSDF, a new SDN-enabled framework that can meet an ISP’s service delivery constraints concerning cost, scalability, deployment flexibility, and operational ease. We show that meeting these constraints necessitates an SDN philosophy for a centralized management plane, a decoupled (from data) control plane, and a programmable data plane at customer premises. We present an ISP service delivery framework (iSDF) that provides ISPs a domain-specific API for network function virtualization by leveraging a programmable middlebox built from commodity home-routers. It also includes an application server to disseminate, configure, and update ISP services. We develop and report results for three diverse ISP applications that demonstrate the practicality and flexibility of iSDF, namely distributed VPN (control plane decisions), pay-per-site (rapid deployment), and BitTorrent blocking (data plane processing).

Published in: ACM SIGCOMM Computer Communication Review (Volume 44 Issue 3, July 2014)

Combined with the paper in IEEE COMST about botnet detection that was published last year, this yields a grand-total of 2 publications more than I thought would ever bear my name. In any case, my former colleagues are continuing their excellent work on the project which can be tracked at the iSDF wiki-page.

Tags: , , , , , , , , , , , ,

July 1, 2013

Blocking traffic flows selectively with a timeout from Bro IDS

Filed under: Blog — krkhan @ 2:55 am

I needed to block some flows on OpenWRT from the Bro IDS. One option was to install the recent module for expiring iptables rules which sounded like an overkill. After some tinkering around I landed on using bash and at to expire the firewall rules after timeouts (luckily the at daemon was available on OpenWRT which made my job easier).

There are three parts to the process:

The bash script

First, a script which:

  1. Constructs and adds the iptables rule to the FORWARD chain.
  2. Constructs the corresponding deletion rule.
  3. Creates a temporary bash script, writes the rule to it, makes the new script self-deleting.
  4. Schedules a launch of the temporary script with at command.

Here’s the script:

#!/bin/sh
 
if [ $# -le 5 ] ; then
  echo "usage: $0 proto src sport dst dport timeout"
  exit 1
fi
 
proto=$1
src=$2
sport=$3
dest=$4
dport=$5
timeout=$6
 
echo "  proto: $1"
echo "    src: $2"
echo "  sport: $3"
echo "   dest: $4"
echo "  dport: $5"
echo "timeout: $6"
 
rule=""
 
if [ "$proto" != "any" ]; then
  rule="$rule --protocol $proto"
fi
 
if [ "$src" != "0.0.0.0" ]; then
  rule="$rule --source $src"
fi
 
if [ "$sport" != "0" ]; then
  rule="$rule --sport $sport"
fi
 
if [ "$dest" != "0.0.0.0" ]; then
  rule="$rule --destination $dest"
fi
 
if [ "$dport" != "0" ]; then
  rule="$rule --dport $dport"
fi
 
rule="$rule -j DROP"
 
echo "rule: $rule"
 
addcmd="iptables -I FORWARD $rule"
delcmd="iptables -D FORWARD $rule"
 
delscript=`mktemp`
echo "delscript: $delscript"
 
echo "#!/bin/sh" >>$delscript
echo $delcmd >>$delscript
echo "rm \"${delscript}\"" >>$delscript
chmod 755 $delscript
 
echo "adding iptable rule:"
echo $addcmd
`$addcmd`
 
atcmd="at -M -f $delscript now + $timeout min"
echo "creating at job for deletion:"
echo $atcmd
`$atcmd`

Given below is an example run. First, let’s print the default FORWARD chain:

# iptables -nL FORWARD
Chain FORWARD (policy ACCEPT)
target     prot opt source               destination         
ACCEPT     all  --  anywhere             10.42.0.0/24         state RELATED,ESTABLISHED
ACCEPT     all  --  10.42.0.0/24         anywhere            
ACCEPT     all  --  anywhere             anywhere            
REJECT     all  --  anywhere             anywhere             reject-with icmp-port-unreachable
REJECT     all  --  anywhere             anywhere             reject-with icmp-host-prohibited

Block a flow for 2 minutes:

# sh blockflow.sh tcp 50.50.50.50 50 60.60.60.60 60 2
  proto: tcp
    src: 50.50.50.50
  sport: 50
   dest: 60.60.60.60
  dport: 60
timeout: 2
rule:  --protocol tcp --source 50.50.50.50 --sport 50 --destination 60.60.60.60 --dport 60 -j DROP
delscript: /tmp/tmp.SAREJvtsK0
adding iptable rule:
iptables -I FORWARD --protocol tcp --source 50.50.50.50 --sport 50 --destination 60.60.60.60 --dport 60 -j DROP
creating at job for deletion:
at -M -f /tmp/tmp.SAREJvtsK0 now + 2 min
job 79 at Sun Jun 30 14:37:00 2013

Let’s check if the new rule was added:

# iptables -nL FORWARD
Chain FORWARD (policy ACCEPT)
target     prot opt source               destination         
DROP       tcp  --  50.50.50.50          60.60.60.60          tcp spt:50 dpt:60
ACCEPT     all  --  anywhere             10.42.0.0/24         state RELATED,ESTABLISHED
ACCEPT     all  --  10.42.0.0/24         anywhere            
ACCEPT     all  --  anywhere             anywhere            
REJECT     all  --  anywhere             anywhere             reject-with icmp-port-unreachable
REJECT     all  --  anywhere             anywhere             reject-with icmp-host-prohibited

After 2 minutes, the temporary bash script shall remove the rule and then delete itself. To confirm:

# iptables -nL FORWARD
Chain FORWARD (policy ACCEPT)
target     prot opt source               destination         
ACCEPT     all  --  anywhere             10.42.0.0/24         state RELATED,ESTABLISHED
ACCEPT     all  --  10.42.0.0/24         anywhere            
ACCEPT     all  --  anywhere             anywhere            
REJECT     all  --  anywhere             anywhere             reject-with icmp-port-unreachable
REJECT     all  --  anywhere             anywhere             reject-with icmp-host-prohibited

The Bro module

A simple module which exports just one function, i.e., BlockFlow::block which takes a conn_id and a count and calls the bash script with appropriate parameters:

module BlockFlow;
 
export {
  global block: function(id: conn_id, t: count);
}
 
function block(id: conn_id, t: count)
{
  print fmt("blocking %s:%d -> %s:%d for %d minutes", id$orig_h, id$orig_p, id$resp_h, id$resp_p, t);
 
  local protocol = get_port_transport_proto(id$resp_p);
  print fmt("protocol is: %s", protocol);
 
  local cmd: string = fmt("sh blockflow.sh %s %s %d %s %d %d", protocol
                                                             , id$orig_h, id$orig_p
                                                             , id$resp_h, id$resp_p, t);
  print fmt("executing: %s", cmd);
  system(cmd);
}

Bro module usage

And finally, using the module from a Bro script:

@load ./blockflow
 
event bro_init()
  {
    local id: conn_id;
    id$orig_h = 10.10.10.10;
    id$orig_p = 10/tcp;
    id$resp_h = 20.20.20.20;
    id$resp_p = 20/tcp;
    BlockFlow::block(id, 2);
  }

And the flow will be blocked for 2 minutes. Unfortunately, due to the way at command works the granularity of timeouts is limited to minutes. If you really want to block flows for only a few seconds a quick solution would be to use sleep in place of at before expiring the rule.

Tags: , , , , , , , ,

December 10, 2012

Bro IDS on OpenWRT

Filed under: Blog — krkhan @ 12:59 pm

While I was at SysNet, we had been working on a project we called “Shrimp” — Software-defined Home Router Intelligent Monitoring Point. The goal of the project was to provide a framework for easy programmatic access to network monitoring on low-cost, commodity, home router devices. One of the requirements was to have an IDS on the home routers for which we chose Bro — the leading framework for semantic analysis of network traffic.

The OpenWRT OS was chosen as the target platform. Its SDK contained a cross-compile toolchain for CMake projects. However, during the compilation Bro tried to run the binpac and bifcl executables for processing intermediate files. The executables refused to run on the build platform if the target platform architecture was different (mostly the case, e.g., we were building on x86-64 and target was arm).

The (not-so-pretty ™) workaround we used was to build Bro twice. Once for the host, and once for the target. The CMake files were then patched to first generate binpac and bifcl binaries if they weren’t provided and then use the provided binaries if they were defined at make time. The first compile generated the binaries on x86-64 and the second compile (for arm) used the earlier binaries to process the bif files.

The Makefile and patches are available in this tarball: openwrt-bro.tar.gz, while the compiled ipk package is also available for installation. Here is a test execution of Bro on OpenWRT:

# bro –v
bro version 2.0
# cat test.bro
event bro_init()
{
	print "Hello World!";
}

event new_connection(c: connection)
{
	print "New connection created";
}
# bro test.bro
Hello World!
# bro -i br-lan test.bro
Hello World!
New connection created
# ls
conn.log           notice_policy.log  reporter.log       weird.log
dns.log            packet_filter.log  test.bro

A heap of thanks to Zaafar for dealing with my messy code and providing the links to hosted files :) !

Tags: , , , , , , , , ,

June 19, 2010

Using Boyer-Moore-Horspool algorithm on file streams in Python

Filed under: Blog — krkhan @ 4:53 am

Horspool’s algorithm is a simple and efficient string-searching algorithm which trades space for time and performs better as length of search string is increased. Another (perhaps overlooked) advantage of this algorithm is its ability to search through stream files without requiring random access. As I was working on Launchpad for my SoC project I required this particular stream-handling attribute as the file descriptors opened by urllib2 didn’t support seek()ing. Modifying the example code from Wiki page a little, I was able to read() only the required bytes sequentially:

horspool.py

1
2
3
4
5
6
7
8
9
10
11
12
13
14
15
16
17
18
19
20
21
22
23
24
25
26
27
28
29
30
31
32
33
34
35
36
37
38
39
40
41
42
43
44
45
46
47
48
49
50
51
52
53
#!/usr/bin/env python
 
import locale
import os
import sys
import urllib2
 
def boyermoore_horspool(fd, needle):
    nlen = len(needle)
    nlast = nlen - 1
 
    skip = []
    for k in range(256):
        skip.append(nlen)
    for k in range(nlast):
        skip[ord(needle[k])] = nlast - k
    skip = tuple(skip)
 
    pos = 0
    consumed = 0
    haystack = bytes()
    while True:
        more = nlen - (consumed - pos)
        morebytes = fd.read(more)
        haystack = haystack[more:] + morebytes
 
        if len(morebytes) < more:
            return -1
        consumed = consumed + more
 
        i = nlast
        while i >= 0 and haystack[i] == needle[i]:
            i = i - 1
        if i == -1:
            return pos
 
        pos = pos + skip[ord(haystack[nlast])]
 
    return -1
 
if __name__ == "__main__":
    if len(sys.argv) < 3:
        print "Usage: horspool.py <url> <search text>"
        sys.exit(-1)
 
    url = sys.argv[1]
    needle = sys.argv[2]
    needle = needle.decode('string_escape')
 
    fd = urllib2.urlopen(url)
    offset = boyermoore_horspool(fd, needle)
    print hex(offset), '::', offset
    fd.close()

Now comes the fun part:

  • The code can search through any URL without downloading it completely, stopping at the first match. For example, the following command will download only the first few bytes of the provided URL:
    $ ./horspool.py http://www.gutenberg.org/files/132/132.txt "The Art of War"

    0x1d :: 29

  • Unicode searches work perfectly as well. Although the matching takes place according to the character encoding of the terminal used. That’s to say, since I’m using a UTF-8 terminal the “bytes” searched were assumed to be UTF-8 encoded as well:
    $ ./horspool.py http://www.gutenberg.org/files/29011/29011-0.txt "Σημείωση: Ο Πίνακας περιεχομένων"

    0x44f :: 1103

  • Same goes for multi-line searches:
    $ ./horspool.py http://www.gutenberg.org/files/29011/29011-0.txt "διευκόλυνση\r\nτου αναγνώστη"

    0x4b5 :: 1205

Tags: , , , , , , , , ,

May 16, 2010

HOWTO: Query WordPress posts in CMS Made Simple

Filed under: Blog — krkhan @ 3:53 pm

While I run my blog at inspirated.com, I aggregate posts related to coding at the subdomain code.inspirated.com. The websites are run through WordPress and CMS Made Simple respectively.

For the latter, I needed to find a way of fetching blog posts from the main site for linking. Initially, I used tag feeds for this purpose. That is, I used the RSS module for CMS-MS and fetched the feed for a particular tag (e.g., inspirated.com/tag/code/feed). This worked well for a while until the feeds became large and I noticed that only the most recent 10 posts were showing up in the listings.

Digging around, I found this piece of documentation which explains how one can use custom queries for collecting WordPress posts from a blog. There was a catch however as the code for doing so could only be run globally. In other words, if I tried running the code mentioned on the page inside a User Defined Tag in CMS-MS I would get strange errors.

The solution was to run the code in a separate PHP file. Here’s how:

  1. Create a file named wp.php in your CMS-MS folder with the following code:
    1
    2
    3
    4
    5
    6
    7
    8
    9
    10
    11
    12
    13
    14
    15
    16
    17
    18
    19
    20
    21
    22
    23
    24
    25
    26
    27
    28
    29
    30
    31
    32
    33
    34
    35
    36
    
    <?php
    require_once('/path/to/wordpress/wp-blog-header.php');
    // edit the path in the line above to point to your wp-blog-header.php
     
    $tag = isset($_REQUEST['--tag']) ? $_REQUEST['--tag'] : 'code';
    $count = isset($_REQUEST['--count']) ? $_REQUEST['--count'] : '-1';
    $after = isset($_REQUEST['--after']) ? $_REQUEST['--after'] : '1970-01-01';
     
    function filter_where($where = '') {
        global $after;
        $where .= " AND post_date >= '".$after."'";
        return $where;
    }
    add_filter('posts_where', 'filter_where');
     
    query_posts('tag='.$tag.'&posts_per_page='.$count);
     
    echo "<ul>";
    if ( have_posts() ) : while ( have_posts() ) : the_post();
        echo "<li>";
        echo "<a href=\"";
        echo the_permalink();
        echo "\">";
        echo the_title();
        echo "</a>";
        echo " (";
        echo the_time('F jS, Y');
        echo ")";
        echo "</li>\n";
    endwhile; else:
        echo "<li>No posts found</li>\n";
    endif;
    echo "</ul>";
     
    wp_reset_query();
    ?>
  2. Add a User Defined Tag in CMS-MS with the following code:
    1
    2
    3
    4
    5
    6
    7
    8
    9
    10
    11
    12
    13
    14
    15
    16
    17
    18
    19
    20
    
    $path = 'whoami | php -q /path/to/wp.php';
    // edit the path in the line above to point to the wp.php created in previous step
     
    // whoami command piped for no reason because my script wasn't
    // producing any output without it
     
    if(isset($params['tag'])) {
        $path .= ' --tag='.$params['tag'];
    }
     
     
    if(isset($params['count'])) {
        $path .= ' --count='.$params['count'];
    }
     
    if(isset($params['after'])) {
        $path .= ' --after='.$params['after'];
    }
     
    echo `$path`;
  3. Use the tag in any CMS-MS page with any of the following combinations:
    • List all posts with the tag code:
      {wp_posts_with_tag tag="code"}
    • List 10 posts with the tag code:
      {wp_posts_with_tag tag="code" count="10"}
    • List all posts with the tag code after May 1st, 2009:
      {wp_posts_with_tag tag="code" after="2009-05-01"}

Custom queries are very powerful once you get them working. Anyone planning on using them should take a look at the function reference for getting to grips with the flexibility they offer.

Tags: , , , , ,

February 7, 2010

Faking User-Agent with PyS60

Filed under: Blog — krkhan @ 12:00 am

“Anyone who slaps a ‘this page is best viewed with Browser X’ label on a Web page appears to be yearning for the bad old days, before the Web, when you had very little chance of reading a document written on another computer, another word processor, or another network.” — Tim Berners-Lee in Technology Review, July 1996

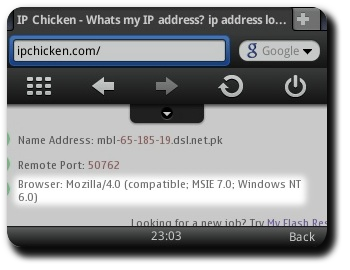
People never learn. Slapping such labels is one thing, they even go as far as adopting brain-dead practices of checking user-agent strings and refusing service to any browser not originating from Redmond. For example, Opera Mobile — the sexiest mobile application on planet — works astonishingly well for Javascript websites. Nevertheless, when trying to browse my university’s academic management portal on it I am presented with a big ugly “We’re dumb, you need to open this page with Internet Explorer 6.0 or later because it uses JAVASCRIPTXX0RZ.” Even though Opera does allow spoofing of user-agent strings, the fake strings still contained “Symbian” as the operating system which still resulted in incompatibility errors.

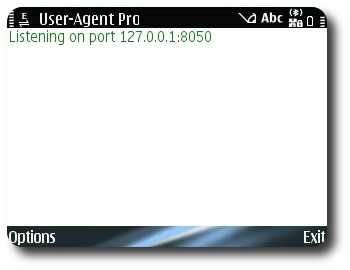
As ever, Python came to the rescue. Firing up the Twisted framework, I created a simple HTTP proxy which modifies the user-agent string on the fly. Peaches:

Opera Mobile User Agent Spoofed
User-Agent Proxy Screeshot

The script is still very quirky and is the farthest thing from what you’d call a stable solution. You can download the inital release here. The zip file contains the tiny proxy server script as well as Twisted and Zope dependencies. Good luck with trying to counter retards who’re doing everything they can to avoid compatibility. Yes, even 14 years after Sir Tim’s veracious proclamation.

Tags: , , , , , , , , , , ,

January 6, 2010

(GUI, Mathematical Equations, Scientific Plotting) = (GTK+, LaTeX, Matplotlib)

Filed under: Blog — krkhan @ 10:16 am

GTK+ needs no introduction. LaTeX is the first thing that pops in anyone’s mind if mathematical equations’ typesetting is under consideration. Matplotlib — while not as well-known as the former two — is the super easy and elegant solution for scientific plotting on *nix platforms.

For an application demo, I required all three. Past experience has taught me that the most straightforward way of “gluing” things together is Python. GTK+ therefore = PyGTK. Next up was LaTeX, and a previous solution of mine for embedding LaTeX in PyGTK came to the rescue. The final requirement of Matplotlib was fulfilled without any hassle since the library was already written in Python.

The collective result was pretty:

radareq-0.1.tar.gz

Screenshot of GTK+ with LaTeX and Matplotlib
(Click on the image for larger version.)

The linked tarball contains the Python scripts for the application. For everything to run smoothly, LaTeX and Matplotlib packages need to be installed on your system. If you encounter any issues running the code, feel free to flame your distribution for the apparent lack of sanity regarding package management.

Tags: , , , , , , , , , , ,

October 31, 2009

HOWTO: Use PyS60’s Bluetooth Console on Fedora/Ubuntu/Debian Linux

Filed under: Blog — krkhan @ 11:03 pm

While developing PyS60 apps is one of the most fun things you could do with your Nokia phone, debugging them isn’t as zippy as one would hope for in a Py development environment. To make up for that, PyS60 gives the developers an option for directly connecting to the interpreter through Bluetooth. Doesn’t sound very appealing? How about this: You connect your laptop with the cellphone, jump in at some place in the code while your app is executing and then use lappy’s big keyboard for exploiting different code and values in the interpreter. Sounds better?

To accomplish this on a Linux distro, you will need the following packages installed on your system:

Name Links
gnome-bluetooth
uucp/cu

After making sure that both are present on your system, install PyS60 on your phone if you haven’t already done so.

Now the fun part:

  1. Switch on Bluetooth in the cellphone.

    PyS60 Bluetooth HOWTO, Mobile screenshot #1

  2. Launch bluetooth-properties and click on “Setup New Device”.

    PyS60 Bluetooth HOWTO, PC screenshot #1

  3. Select your cellphone.

    PyS60 Bluetooth HOWTO, PC screenshot #2

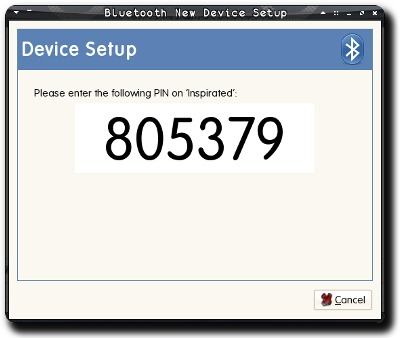
  4. You will be shown a pin.

    PyS60 Bluetooth HOWTO, PC screenshot #3

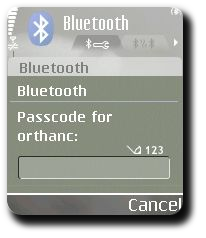
  5. Enter the pin when queried on the cellphone.

    PyS60 Bluetooth HOWTO, Mobile screenshot #2

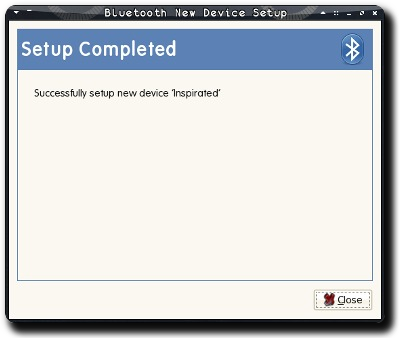
  6. The phone should be successfully paired.

    PyS60 Bluetooth HOWTO, PC screenshot #4

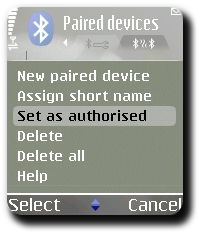
  7. Authorize your Linux system to make automatic connections to the phone.

    PyS60 Bluetooth HOWTO, Mobile screenshot #3

  8. As root, run this shell script:
    [root@orthanc ~]# ./rfcomm-listen.sh

    Serial Port service registered
    Waiting for connection on channel 2

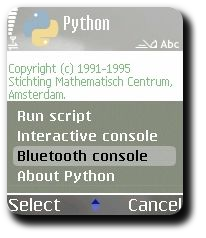
  9. Launch PyS60 interpreter and select “Bluetooth Console” from the application menu.

    PyS60 Bluetooth HOWTO, Mobile screenshot #4

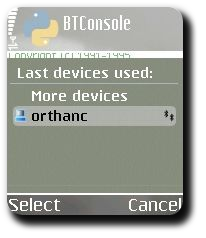
  10. Select your Linux machine.

    PyS60 Bluetooth HOWTO, Mobile screenshot #5

    The command you ran in previous step should have new output:

    [root@orthanc ~]# ./rfcomm-listen.sh

    Serial Port service registered
    Waiting for connection on channel 2
    Connection from 00:17:4B:B6:35:31 to /dev/rfcomm0
    Press CTRL-C for hangup

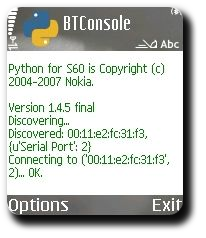
    The cellphone screen should be showing something like this:

    PyS60 Bluetooth HOWTO, Mobile screenshot #6

  11. As root again, open a new terminal and run:
    [root@orthanc ~]# cu -l /dev/rfcomm0

    Connected.

  12. Hit Enter till prompt (>>>) appears, then type:

    >>> import appuifw
    >>> appuifw.query(u'Hello World', 'text')

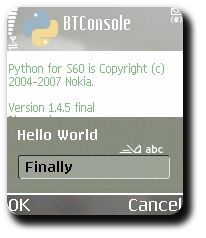
  13. Viola, you should have an input box on the mobile screen:

    PyS60 Bluetooth HOWTO, Mobile screenshot #7

  14. Enter any text and press the OK key. It should be show up in the terminal you were using to type in code:

    >>> import appuifw
    >>> appuifw.query(u'Hello World', 'text')
    u’Finally’

  15. Exit the interpreter by typing CTRL+D on an empty line:

    >>> import appuifw
    >>> appuifw.query(u'Hello World', 'text')
    u’Finally’
    >>>
    Interactive interpreter finished.
    cu: Got hangup signal

    Disconnected.

Pat yourself on the back. Now, you can use your Bluetooth console to import your modules, execute some stuff and then jump in the middle to test some extra lines or values. In fact, I found it to be a pretty darned good way of learning about PyS60’s API. Res secundae!

Tags: , , , , , , , , , , , , , , , ,

September 10, 2009

HOWTO: Use LaTeX mathematical expressions in PyGTK

Filed under: Blog — krkhan @ 10:04 pm

I had never really laid my hands on LaTeX until I required it in one of the helper applications for my graduation project. Unfortunately, the requirement wasn’t as simple as producing some documents as I had to embed mathematical expressions on the fly in my PyGTK apps. Googling around for the solution, I found GtkMathView which accomplished something similar to this albeit using MathML. However, my luck ran out on me again as the widget lacked Python bindings. The other solution was to generate transparent PNGs on the fly and include them as GtkImages. This worked rather well, as the final code allowed easy modifications to the generated expressions.

Requirements for the code were:

Final results:

LaTeX in PyGTK

And the simple code behind it:

1
2
3
4
5
6
7
8
9
10
11
12
13
14
15
16
17
18
19
20
21
22
23
24
25
26
27
28
29
30
31
32
33
34
35
36
37
38
39
40
#!/usr/bin/env python
"""An example demonstrating usage of latexmath2png module for embedding math
equations in PyGTK
 
Author: Kamran Riaz Khan <krkhan@inspirated.com>
"""
 
import gtk
import os
import latexmath2png
 
pre = 'gtktex_'
eqs = [
	r'$\alpha_i > \beta_i$',
	r'$\sum_{i=0}^\infty x_i$',
	r'$\left(\frac{5 - \frac{1}{x}}{4}\right)$',
	r'$s(t) = \mathcal{A}\sin(2 \omega t)$',
	r'$\sum_{n=1}^\infty\frac{-e^{i\pi}}{2^n}$'
	]
latexmath2png.math2png(eqs, os.getcwd(), prefix = pre)
 
def window_destroy(widget):
	for i in range(0, len(eqs)):
		os.unlink(os.path.join(os.getcwd(), '%s%d.png' % (pre, i + 1)))
	gtk.main_quit()
 
window = gtk.Window()
window.set_border_width(10)
window.set_title('LaTeX Equations in GTK')
window.connect('destroy', window_destroy)
vbox = gtk.VBox(spacing = 10)
window.add(vbox)
 
images = [None] * len(eqs)
for i in range(len(eqs)):
	images[i] = gtk.image_new_from_file('%s%d.png' % (pre, i + 1))
	vbox.pack_start(images[i])
 
window.show_all()
gtk.main()
Tags: , , , , , , , , , ,
Next Page »