Inspirated


October 31, 2009

HOWTO: Use PyS60’s Bluetooth Console on Fedora/Ubuntu/Debian Linux

Filed under: Blog — krkhan @ 11:03 pm

While developing PyS60 apps is one of the most fun things you could do with your Nokia phone, debugging them isn’t as zippy as one would hope for in a Py development environment. To make up for that, PyS60 gives the developers an option for directly connecting to the interpreter through Bluetooth. Doesn’t sound very appealing? How about this: You connect your laptop with the cellphone, jump in at some place in the code while your app is executing and then use lappy’s big keyboard for exploiting different code and values in the interpreter. Sounds better?

To accomplish this on a Linux distro, you will need the following packages installed on your system:

Name Links
gnome-bluetooth
uucp/cu

After making sure that both are present on your system, install PyS60 on your phone if you haven’t already done so.

Now the fun part:

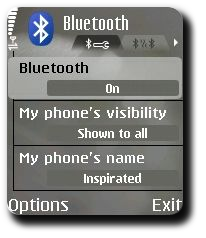
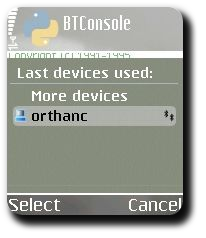
  1. Switch on Bluetooth in the cellphone.

    PyS60 Bluetooth HOWTO, Mobile screenshot #1

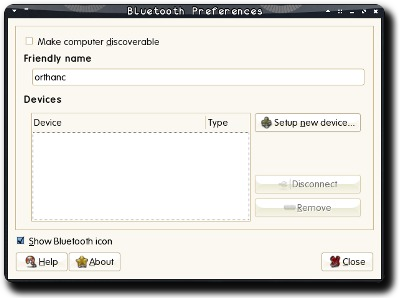
  2. Launch bluetooth-properties and click on “Setup New Device”.

    PyS60 Bluetooth HOWTO, PC screenshot #1

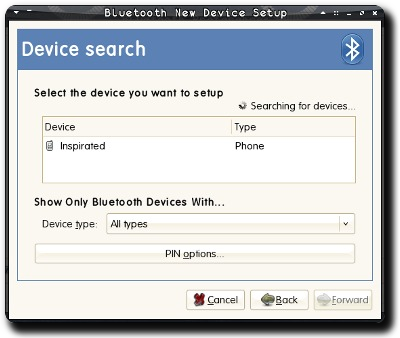
  3. Select your cellphone.

    PyS60 Bluetooth HOWTO, PC screenshot #2

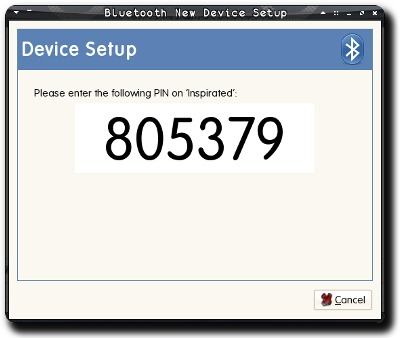
  4. You will be shown a pin.

    PyS60 Bluetooth HOWTO, PC screenshot #3

  5. Enter the pin when queried on the cellphone.
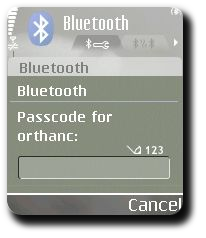
    PyS60 Bluetooth HOWTO, Mobile screenshot #2

  6. The phone should be successfully paired.
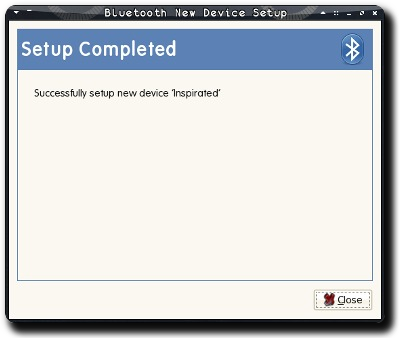
    PyS60 Bluetooth HOWTO, PC screenshot #4

  7. Authorize your Linux system to make automatic connections to the phone.
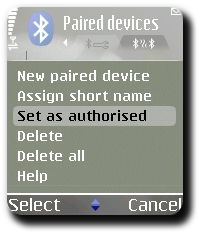
    PyS60 Bluetooth HOWTO, Mobile screenshot #3

  8. As root, run this shell script:
    [root@orthanc ~]# ./rfcomm-listen.sh

    Serial Port service registered
    Waiting for connection on channel 2

  9. Launch PyS60 interpreter and select “Bluetooth Console” from the application menu.
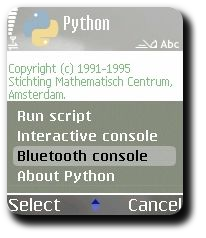
    PyS60 Bluetooth HOWTO, Mobile screenshot #4

  10. Select your Linux machine.

    PyS60 Bluetooth HOWTO, Mobile screenshot #5

    The command you ran in previous step should have new output:

    [root@orthanc ~]# ./rfcomm-listen.sh

    Serial Port service registered
    Waiting for connection on channel 2
    Connection from 00:17:4B:B6:35:31 to /dev/rfcomm0
    Press CTRL-C for hangup

    The cellphone screen should be showing something like this:
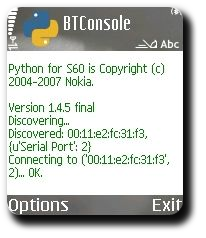
    PyS60 Bluetooth HOWTO, Mobile screenshot #6

  11. As root again, open a new terminal and run:
    [root@orthanc ~]# cu -l /dev/rfcomm0

    Connected.

  12. Hit Enter till prompt (>>>) appears, then type:

    >>> import appuifw
    >>> appuifw.query(u'Hello World', 'text')

  13. Viola, you should have an input box on the mobile screen:
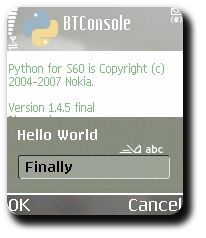
    PyS60 Bluetooth HOWTO, Mobile screenshot #7

  14. Enter any text and press the OK key. It should be show up in the terminal you were using to type in code:

    >>> import appuifw
    >>> appuifw.query(u'Hello World', 'text')
    u’Finally’

  15. Exit the interpreter by typing CTRL+D on an empty line:

    >>> import appuifw
    >>> appuifw.query(u'Hello World', 'text')
    u’Finally’
    >>>
    Interactive interpreter finished.
    cu: Got hangup signal

    Disconnected.

Pat yourself on the back. Now, you can use your Bluetooth console to import your modules, execute some stuff and then jump in the middle to test some extra lines or values. In fact, I found it to be a pretty darned good way of learning about PyS60’s API. Res secundae!

Tags: , , , , , , , , , , , , , , , ,

October 24, 2009

The curious case of Screenlets

Filed under: Blog — krkhan @ 7:40 pm

Screenlets

Apple fans have Dashboard. KDE folks have Plasma. Gnome/Xfce people have, er.. tough choice.

Everyone likes desktop widgets. They’re pretty, and can prove to be really helpful with careful setup. Over the past few years, I have tried a few different widget frameworks and it’s kind of a strange phenomenon that all of them died the slow open-source death. adesklets, gDesklets and now Screenlets have bitten the dust. Screenlets, however, deserves special mention because of being the most recent among the deceased.

People behind Screenlets deserve credit for providing an easy-to-use framework for desktop widgets, which wasn’t the case with adesklets or gDesklets. Nevertheless, the compliment is in a way reserved for the basic framework and not the screenlets themselves. While it was fun and easy to write new widgets in Python, the existing ones were broken more often than not. There must be 100+ screenlets available online right now; pick any recent vanilla distribution and a considerably many will fail to work properly on it. Perhaps this is one of the reasons why the package never made it into Fedora repositories. The base product had significant potential, but the end-results built upon it were — in the greater picture — largely a disappointment. Before the situation improved however, Screenlets passed away quietly. Without even an obituary on Wikipedia or the project page itself. People like me who were waiting for a stable release kept finding out through Launchpad comments that development has split and moved to a new project called Universal Applets.

UA is still in early development stages, and does not offer even all the features present in Screenlets’ last version (such as widget zoom). But at least among all the remaining Gtk+ widget frameworks, it remains the only one with active development going on. While I wish its developers good luck for what appears to be a more promising framework than any of the ones mentioned above, I can only hope that it doesn’t disappear into obscurity like its ancestors — resulting in a Yet-Another-Widget-Framework. Meanwhile, I’m sticking with Screenlets’ last release since it works reasonable well once you’ve sorted individual widgets’ kinks out.

Sometimes, migrating to Qt doesn’t sound all that bad of an idea.

Tags: , , , , , , , , , ,

October 17, 2009

HOWTO: Integrate Compiz Fusion with Xfce the right way

Filed under: Blog — krkhan @ 10:03 pm

In past, I had always struggled to find the “correct” way of launching Compiz Fusion while starting Xfce. For a while, I had resorted to the easiest — and not perhaps the prettiest — way of launching Fusion Icon with the desktop autostart files. The problem with this method lied in the fact that Xfwm was launched before Fusion, and the most glaring workaround was to write my own xinitrc files for X startup, which was just uglier anyway.

Xfce’s own documentation is as bare as my memory while running it, so the right way was not actually obvious until I was fiddling around my configuration directory a few days ago. There, I found an interesting file named xfce4-session.xml. To truly exploit this lovely thing, I first copied it into my home configuration directory:

[krkhan@orthanc ~]$ cp /etc/xdg/xfce4/xfconf/xfce-perchannel-xml/xfce4-session.xml ~/.config/xfce4/xfconf/xfce-perchannel-xml/xfce4-session.xml

And then edited the file with a text-editor, making it look something like:

1
2
3
4
5
6
7
8
9
10
11
12
13
14
15
16
17
18
19
20
21
22
23
24
25
26
27
28
29
30
31
32
33
34
35
36
37
38
39
<?xml version="1.0" encoding="UTF-8"?>
<channel name="xfce4-session" version="1.0">
  <property name="general" type="empty">
    <property name="FailsafeSessionName" type="string" value="Failsafe"/>
    <property name="SessionName" type="string" value="Default"/>
    <property name="SaveOnExit" type="bool" value="false"/>
  </property>
  <property name="sessions" type="empty">
    <property name="Failsafe" type="empty">
      <property name="IsFailsafe" type="bool" value="true"/>
      <property name="Count" type="int" value="5"/>
      <property name="Client0_Command" type="array">
        <value type="string" value="fusion-icon"/>
        <value type="string" value="--force-compiz"/>
      </property>
      <property name="Client0_PerScreen" type="bool" value="false"/>
      <property name="Client1_Command" type="array">
        <value type="string" value="xfce4-panel"/>
      </property>
      <property name="Client1_PerScreen" type="bool" value="false"/>
      <property name="Client2_Command" type="array">
        <value type="string" value="Thunar"/>
        <value type="string" value="--daemon"/>
      </property>
      <property name="Client2_PerScreen" type="bool" value="false"/>
      <property name="Client3_Command" type="array">
        <value type="string" value="xfdesktop"/>
      </property>
      <property name="Client3_PerScreen" type="bool" value="false"/>
      <property name="Client4_Command" type="array">
        <value type="string" value="xfce4-settings-helper"/>
      </property>
      <property name="Client4_PerScreen" type="bool" value="false"/>
    </property>
  </property>
  <property name="splash" type="empty">
    <property name="Engine" type="string" value=""/>
  </property>
</channel>

Lines 13-15 initially referred to Xfwm’s commands, but replacing them with the Fusion Icon ones worked like a charm. This way, Fusion is always guaranteed a launch, which actually wasn’t the case with other workarounds.

Tags: , , , , , , ,

October 5, 2009

Emu8086 Hardware Interrupt Editor & Generator

Filed under: Blog — krkhan @ 7:41 pm

If there has been a closed-source software which I have enjoyed using at my university, it’s Emu8086. The shareware, as the name suggests, emulates the 8086 processor down to the minutest detail. Since 8086/8088 processors form a significant part of my Microprocessor Interfacing & Programming course, I have grown rather fond of the software’s workings.

Recently, I needed to generate hardware interrupts on the emulator. Not only that, but I wanted to use my own service routines for the interrupts so that I could try to understand what happens behind-the-scenes in such scenarios. Reading through the Emu8086 documentation, I figured out that two files are responsible for accomplishing the required tasks:

  1. INT_VECT: A 1024-byte interrupt vector containing 256 entries, with each entry being a 4-byte offset:segment pair.
  2. emu8086.hw: A 256-byte file with each byte representing a corresponding interrupt. A non-zero byte signifies that particular interrupt being active. The byte is set to zero again after the interrupt is serviced.

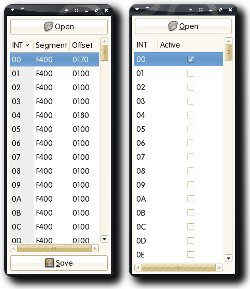
As manually editing these files became cumbersome, I had to code two PyGTK apps for editing these files in a pretty interface:

Emu8086 Hardware Interrupt Editor & Generator Screenshot
(Click on the thumbnail for larger version.)

The intvecteditor.py file lets the user load/edit/save an 8086 interrupt vector. Similarly, the hwintgen.py allows the user to load an emu8086.hw and then generate/monitor interrupts in it. The utilities require PyGTK to run, but I find it infinitely easier now to analyze interrupt behavior of the emulator. This also lead to an interesting observation, as the emulator checked for interrupts at the beginning of an instruction instead of at its end — something which didn’t confirm with the actual 8086 working model.

x86 is fun. After all,

“Do you program in assembly?”
NOP

Tags: , , , , , , , , , , , ,